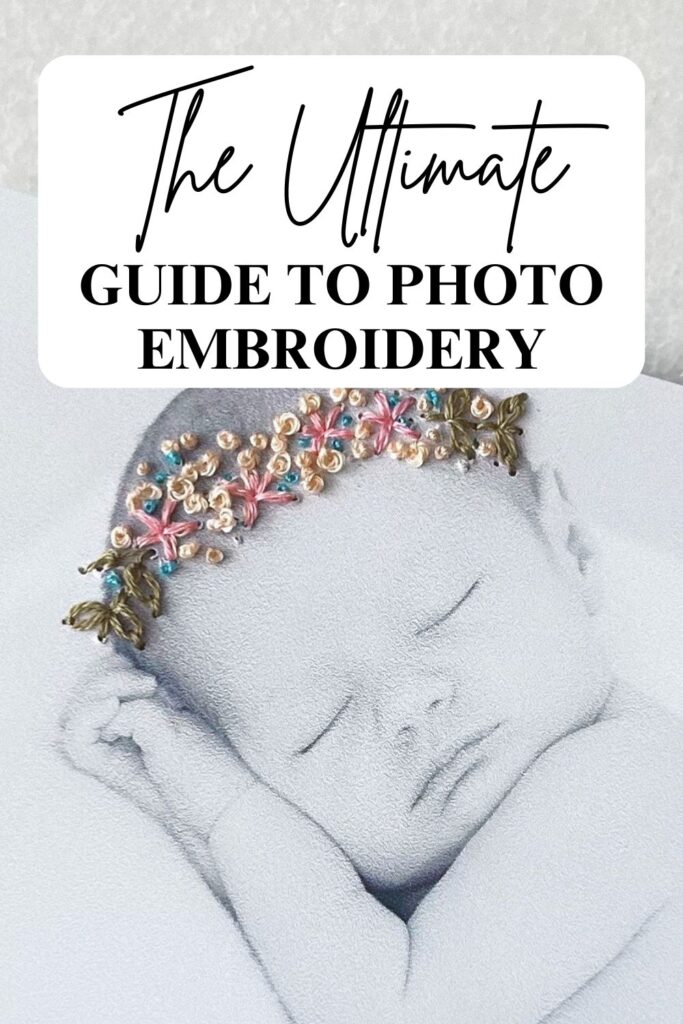
Stitching Memories: A Beginner’s Guide to Photo Embroidery
Affiliate links may be used in this post and if so I will receive a commission at no extra cost to you. I’m also part of the Amazon Affiliate (Associate) program where I earn a commission from sales made through my affiliate links. Find my full disclosure policy by clicking here.
Last Updated on May 29, 2025 by Nell Marie
Have you ever looked at a photo and thought, “This would be even better with a little sparkle, color, or texture?” That’s where photo embroidery comes in—a creative and charming way to bring new life to your favorite snapshots. Whether it’s a black-and-white print of your grandparents’ wedding or a colorful picture of your pet doing something goofy, adding embroidery can turn any photo into a work of art.
Save on Pinterest
In this guide, I’ll walk you through everything you need to know about embroidering on a photo—from choosing the right picture to picking the perfect stitches and materials. Let’s dive in and start stitching some memories!
What Is Photo Embroidery?
Photo embroidery is exactly what it sounds like—embroidering directly onto a printed photograph. You use needle and thread to embellish parts of the image, highlight details, or add completely new elements like florals, stars, or handwritten words. Think of it as a mashup between photography, illustration, and fiber art.
It’s a wonderful craft for beginners and experienced stitchers alike. You don’t need fancy tools or techniques—just some basic supplies, a little patience, and a love for getting creative.
Supplies You’ll Need
Before you start, gather these materials:
Basic Supplies:
- A printed photo (matte photo paper or cardstock works best) (This is the exact paper I use.) (I’ve also used Canvas paper and like the give it provided.)
- Embroidery needle with a small eye and sharp end.
- Embroidery floss in your choice of colors
- Awl, pin, or safety pin (for pre-punching holes) (This is the one I use!)
- Scissors
- Tape or washi tape (to reinforce the back)
- Pencil (for transferring the design)
Bonus Supplies:
- Foam pad or cardboard (to protect your surface when poking holes) (This is the foam pad I use.)
- Ruler or template (if you’re doing straight lines or patterns)
Step-by-Step Guide to Embroidering on a Photo
1. Choose the Right Photo
Start with a photo that has meaning to you, but also think about clarity. Photos with strong shapes, good contrast, and a simple background work best for embroidery. Black-and-white prints can make colored stitches pop, while color photos give you room to play with complementary threads.
💡 Pro Tip: Print your photo on matte photo paper or thick cardstock. Glossy photo paper can crack or tear when stitched. I like this matte photo paper for my embroidered photos.
2. Plan Your Design
Look closely at the photo and decide what you want to embellish. Here are some fun ideas:
- Outline a face, pet, or object
- Add florals around the border
- Embroider words or dates
- Stitch a rainbow, stars, or heart accents
- Highlight textures like hair, clothes, or sky
Lightly sketch your design on the photo using a pencil. If your stitches won’t cover all the pencil lines, I recommend laying tracing paper over it and then poking along the design, where the holes for your stitches will go. You can also freehand it, if you’re more comfortable with embroidery – that’s what I often do.
3. Punch Holes for Stitching
Because you’ll be stitching through paper, it’s a good idea to pre-punch your holes to avoid tearing. Although if you use a sharp needle with a little eye (with 1-2 strands of floss), I’ve found that I can poke holes without prepoking. But, the best idea of to prepoke holes.
Here’s how:
- Place your photo on a soft foam pad or a piece of cardboard.
- Using a pin, needle, or awl, gently poke holes along your design lines. Space them as you would for hand stitching—close together for curves or detailed areas, wider apart for straight lines.
- Be careful not to punch too close to the edges of the photo, as that could lead to ripping. And, don’t poke holes too close to each other or the hole will split together leading to a larger hole.
4. Thread Your Needle and Start Stitching
Now for the fun part—stitching! Cut a piece of embroidery floss (about 18 inches is good to start) and separate it into 1–2 strands for finer details. Thread your needle, tie a knot at the end, and you’re ready to go.
Start from the back of the photo and gently pull your needle through one of the punched holes. Use small, slow stitches to avoid tearing the paper. Most people find backstitch, running stitch, and French knots to be the easiest for this type of project. I also like detached lazy daisy stitch and woven wheel stitch.
🎨 Fun Stitch Ideas to Try:
- Backstitch – Great for outlining shapes or text
- French knots – Perfect for eyes, flower centers, or polka dots
- Lazy Daisy – Use for florals and leafy details
- Satin stitch – Fill in small areas with solid color – this takes some practice as you can easily punch the holes too close together and rip a hole in the paper.
5. Secure Your Thread Neatly
Once you finish a section, secure the thread on the back with a small piece of washi tape or masking tape. Avoid tying bulky knots, as they can make the photo hard to frame later. This will also help in securing french knots easier than trying to knot the thread on the back without pulling the french knot through the paper.
If you’re doing a larger project with many threads, try to keep your stitches neat and avoid overlapping too much on the back.

6. Add Extra Layers (Optional)
You can layer thread colors, use metallic floss, or add beads, sequins, and even tiny buttons. Don’t be afraid to make your piece feel textured and dimensional—it’s all part of the charm!
7. Frame or Display Your Masterpiece
Once your embroidery is done, it’s time to show it off! You can:
- Frame it in a shadowbox to protect the stitches
- Hang it on a clipboard or string it up with clips
- Place it in a traditional photo frame (without glass) (Or, if you use flat stitches and only 1-2 threads it may work against a pane of glass, too.)
- Add it to a scrapbook or journal
Make sure the back of the photo is flat and clean if you plan to frame it. You might want to glue a piece of cardstock behind it to hide the stitching tape and give it extra strength.
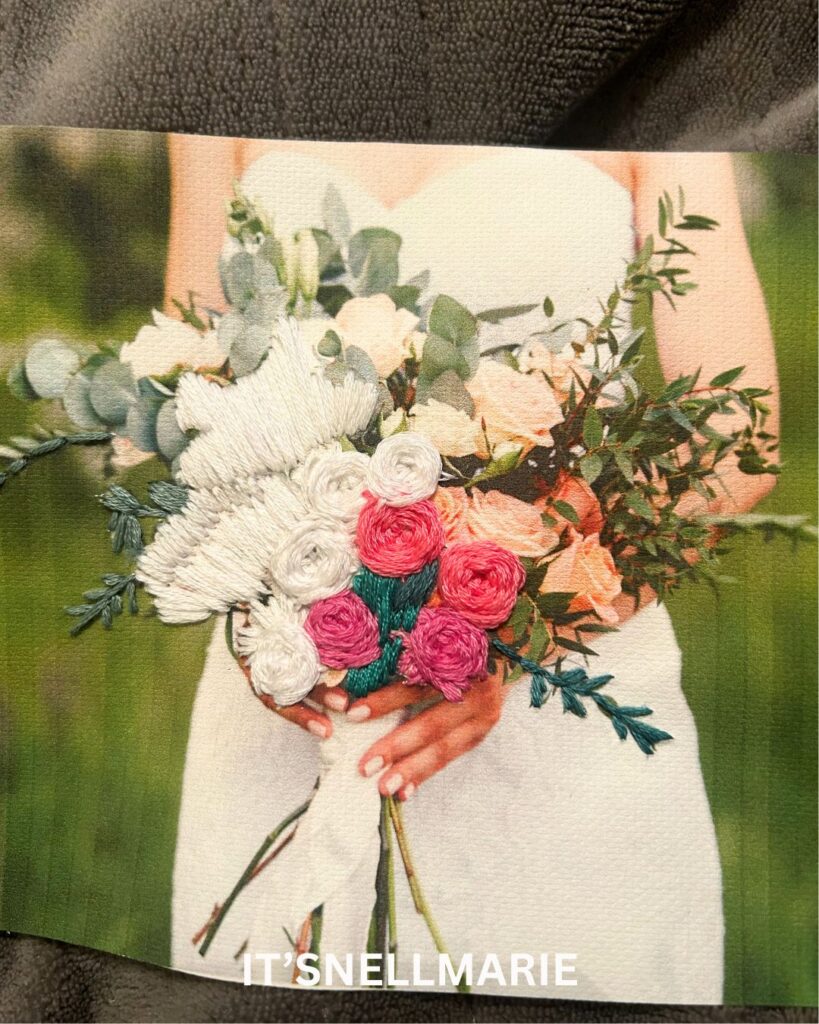
Photo Embroidery Tips and Tricks
Here are a few helpful hints that can make the process easier and more enjoyable:
📌 Go Slow
You’re stitching on paper, not fabric—so take your time! Going too fast can cause the paper to tear or bend.
🎨 Keep It Simple (Especially at First)
Start with small projects or embellishments—like adding flowers to the corners or outlining a silhouette. As you gain confidence, you can create more complex and layered designs.
🖨 Print Extras
Always print a second copy of your photo, just in case the first one gets messed up. Mistakes happen—it’s part of crafting.
✂️ Try Small Photos Too
You don’t need a full 8×10 to start! Small 4×6 prints or even photo booth-style shots can be adorable when embroidered. In fact, I’d recommend a smaller and easier to hold and work with size.
Inspiration for Your Next Photo Embroidery
Need a little creative nudge? Here are some fun project ideas:
- Wedding photo embroidery – Outline the bouquet or add stitched vows
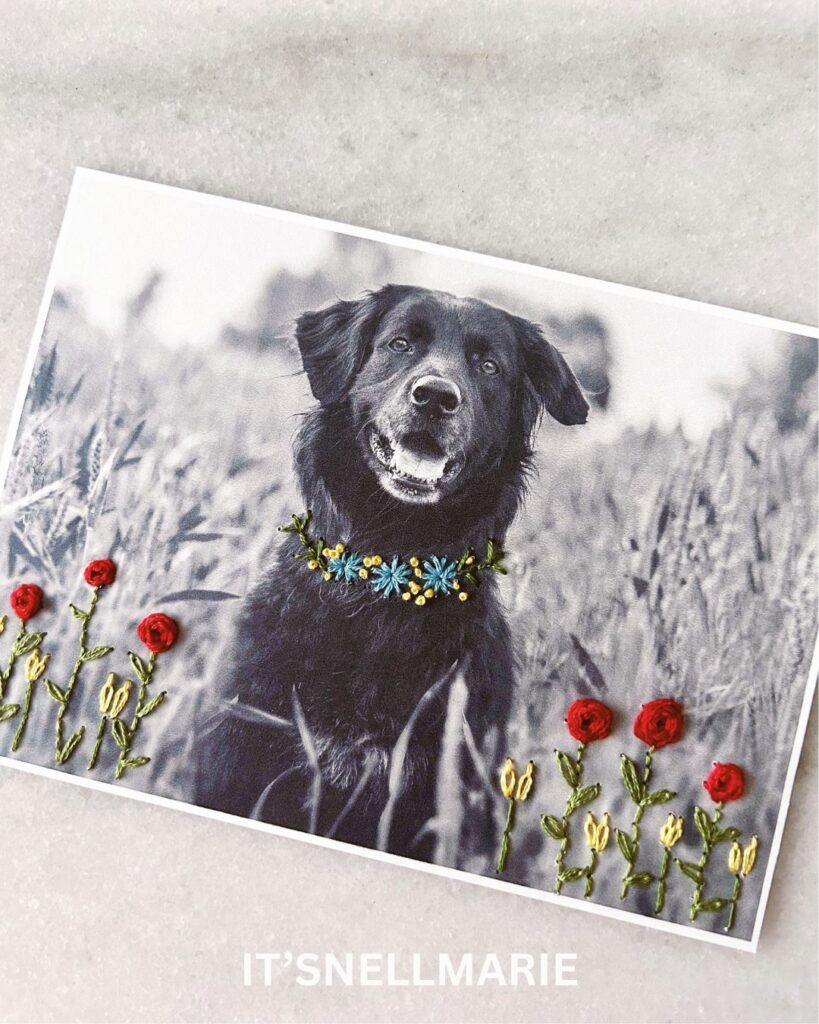
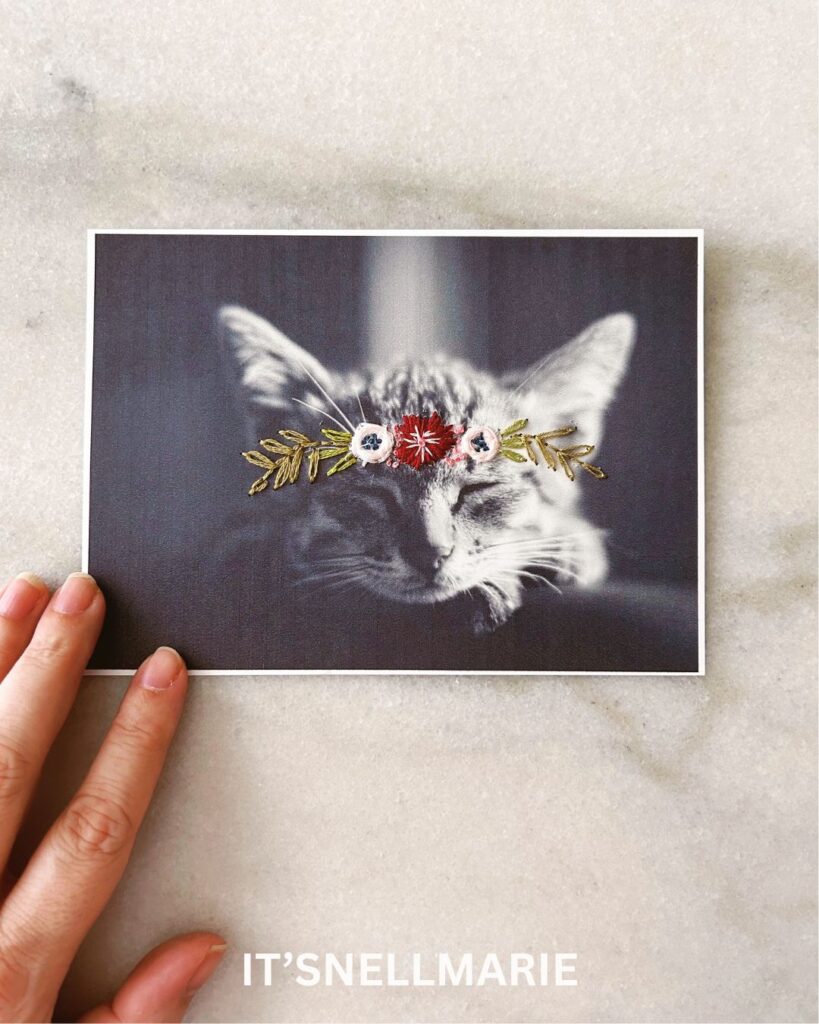
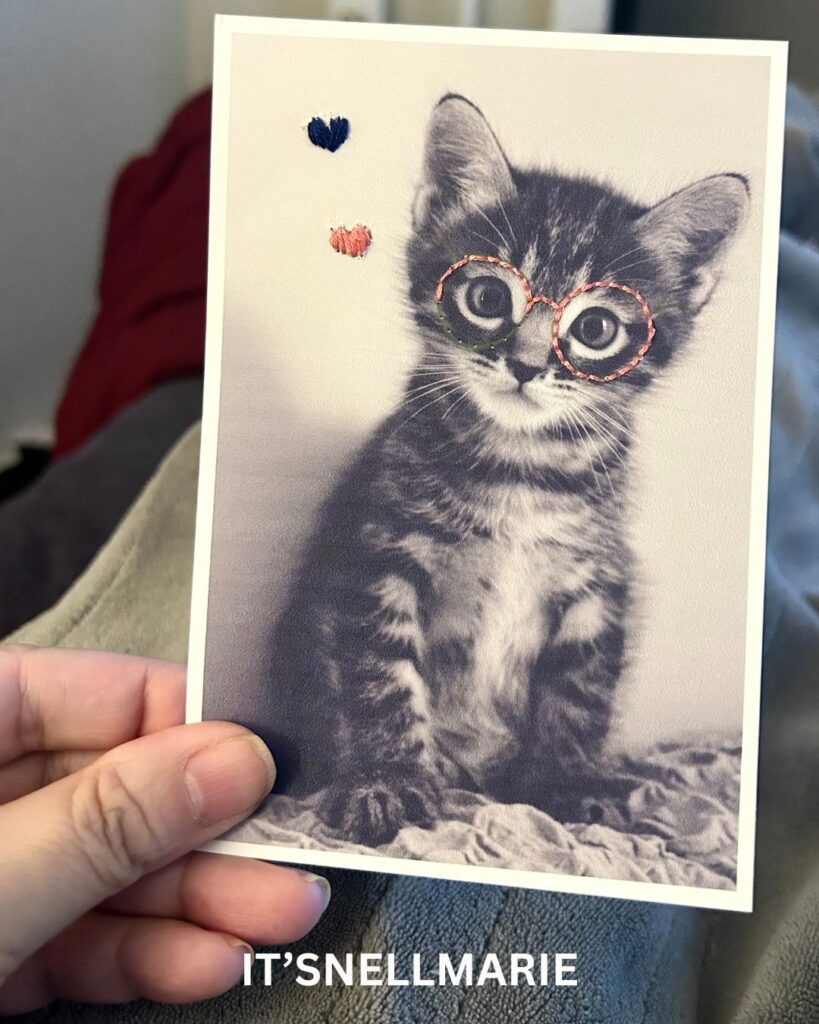
- Pet portraits – Give your furry friend a crown or a bow tie
- Vintage family photo – Add subtle floral accents or names/dates
- Travel photo – Embroider the place name or a tiny stitched sun
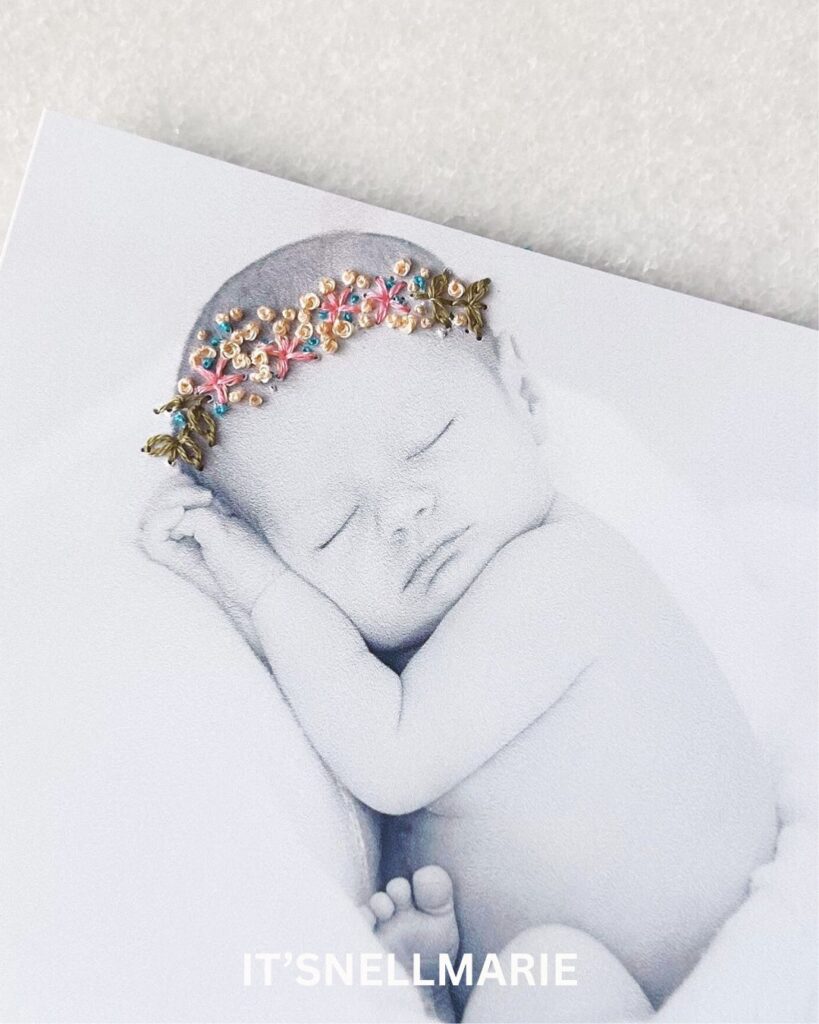
- Baby pictures – Frame a stitched name or heart around their face
You can even make custom embroidered photo gifts for birthdays, anniversaries, or holidays. People love that handmade touch!
Frequently Asked Questions
Can I use any photo paper for embroidery?
Matte photo paper or thick cardstock is best. Glossy paper tends to crack or tear too easily. The paper is key to your success with photo or paper embroidery. I’ve practiced on many papers and this one is my favorite. I also like this Canvas paper for it’s give, it’s forgiving because it self heals much like fabric.
What type of needle should I use?
A sharp embroidery needle, like sizes 5-10 works well. It needs to pierce the paper without being too thick.
Do I need to use an embroidery hoop?
No. It will bend the paper if you try to use a hoop. Simply hold the paper in your hand and stitch that way.
What should I do if my photo tears?
Don’t worry! Patch it with a small piece of tape on the back, and try to avoid stitching too close to the damaged spot. You can also cover tears with a stitched embellishment—like a flower or star. Of, if you’ve just started and have a copy of the photo, just start over with a new photo.
Final Thoughts
Photo embroidery is a sweet, soulful craft that blends nostalgia and creativity. It lets you take something familiar—like a family photo—and turn it into something totally unique and handmade. Even just a few stitches can completely transform a picture into a beautiful keepsake.
So grab your favorite photo, pick out some thread, and start stitching your memories into something magical. The beauty is in the imperfections, the tiny details, and the love behind every stitch.
Save on Pinterest